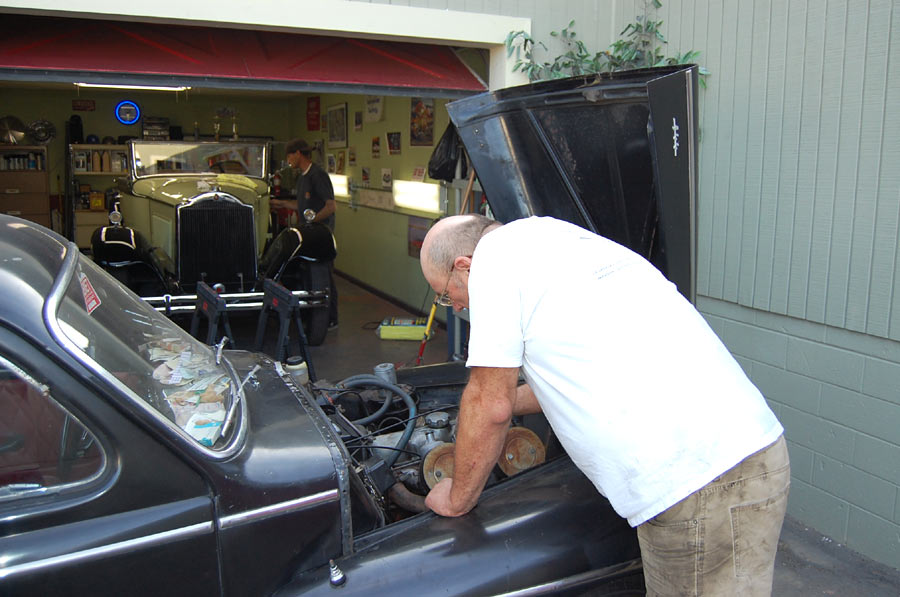
Welcome 2009!
Time to do a tune-up and take care of some minor issues.
|
|
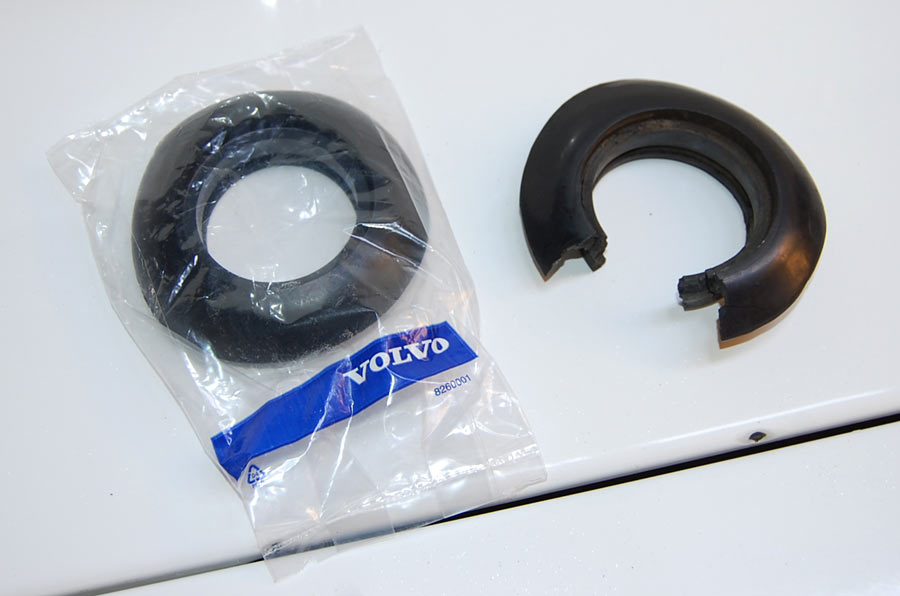
Click on any of the above images for a full-size view
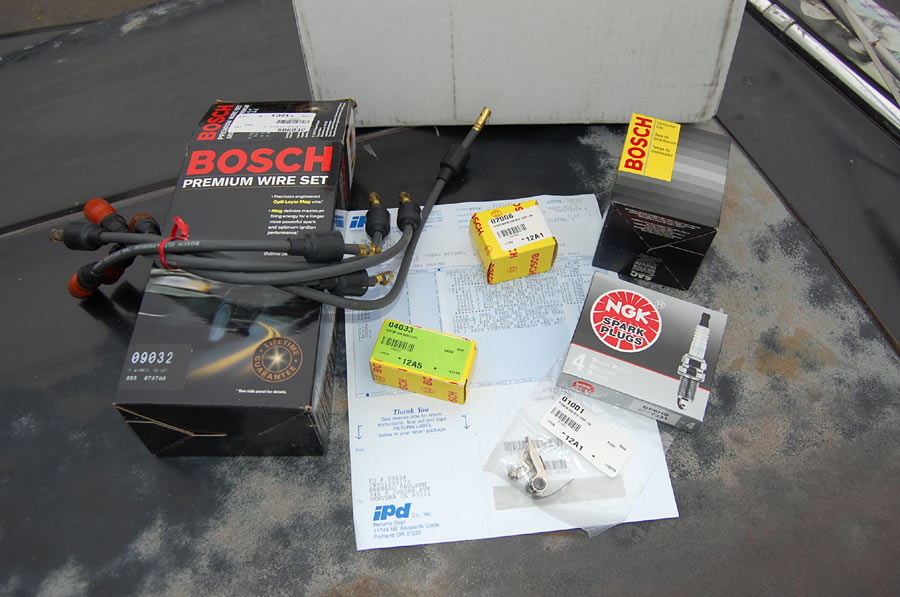
I'm a thrifty shopper, demand quality at the lowest price, and the "tune-up kit" is one of the few items best purchased from IPD. You'll receive a BOSCH distributor cap, condenser, rotor, points, spark plug wires, and a set of NGK spark plugs, all top notch stuff, for around 35 bucks.
Note: do not buy the overpriced Volvo air filter elements there (or anywhere). Follow my instructions on how to convert SU air filters to accept generic elements and save a fortune!
|
|
Click on any of the above images for a full-size view
Since I got the car, the stering wheel sat a bit off center. On many cars, adjusting the steering has to be done by aligning the front end, as mounting the steering wheel in a different position interfers with the turn signal cancelation.
Luckily, on the PV544, as I found out, that is not an issue, as the cancelation device consists of a small metal insert that does not have to align with a pre-set position of the steering wheel. A word of wisdom: before aligning the steering wheel make sure the steering box is aligned correctly. You should be able to turn the wheel the same amount to the right as you can do it to the left. If that's not the case, the steering arm on the steering box has been mounted off center.
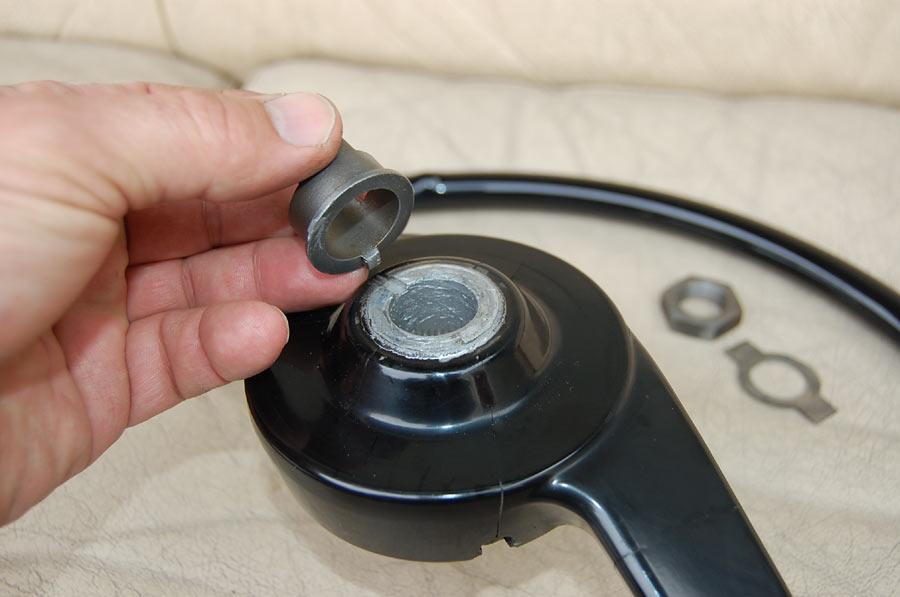
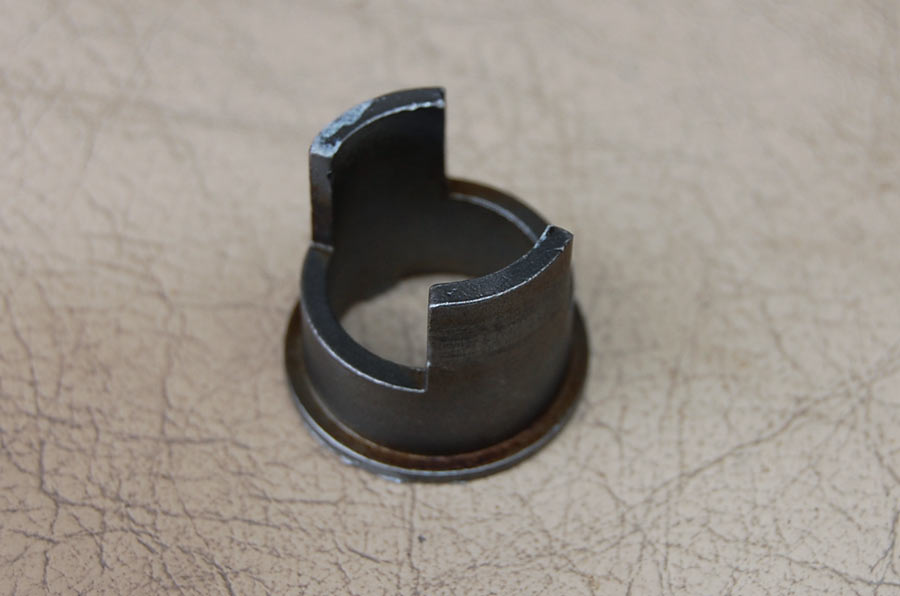
Another thing that bugged me but I somehow procrastinated to take care of is the transmission mount, whose bushing was totally worn out. The mount is bolted to the back of the transmission, and comes off easily by removing two bolts.
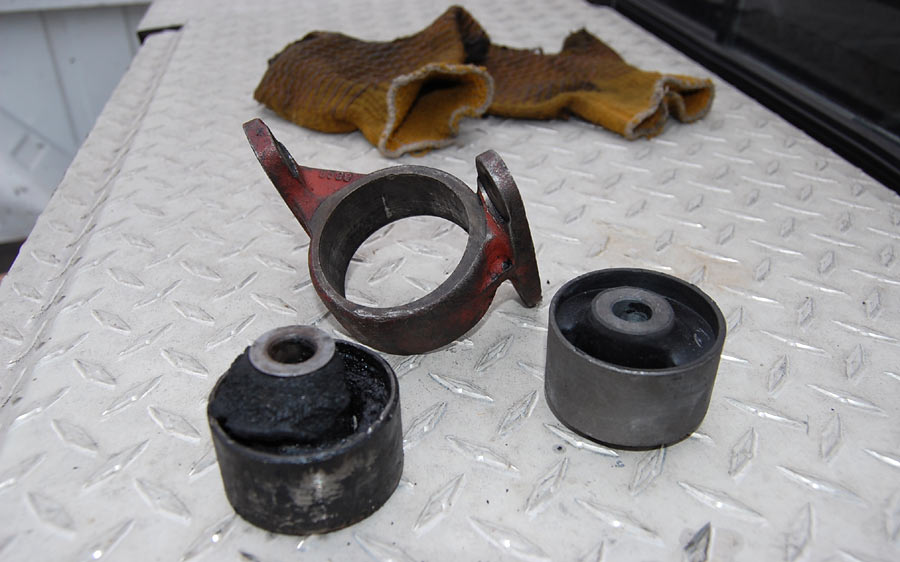
Click on the above image for an XXL-sized view (900 x 562 pixels)
You'll need to press out the old bushing, which can be done with either a press (if you happen to have one) or a hammer. Heating the thing up with a propane torch helps a lot. The old bushing can then be used to hammer the new one in. Caveat: since the inner hole is offset from the center, you'll need to make absolutely sure it's in the same position as the old one. Check the hole's position carefully before pressing it in or you might have to start over.
|
|
Click on any of the above images for a full-size view
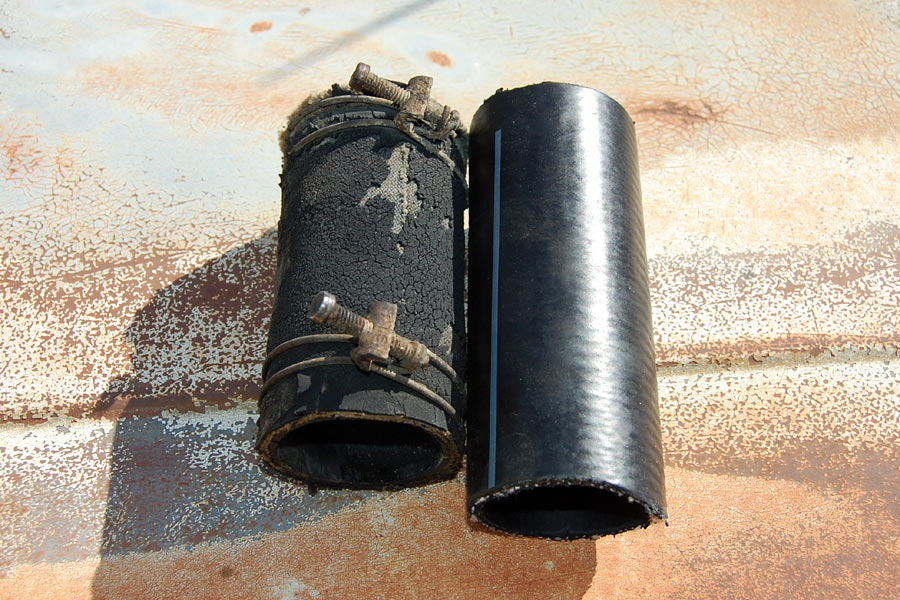
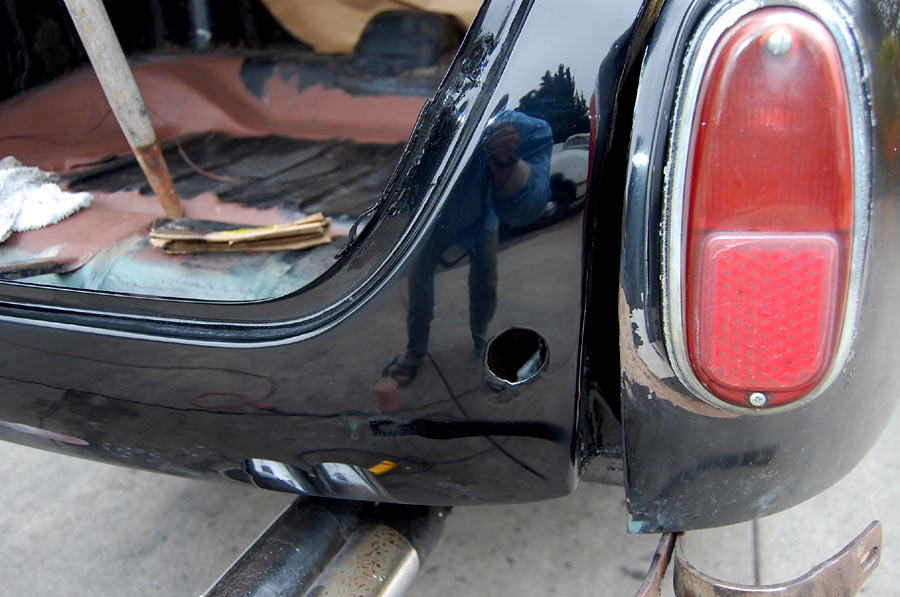
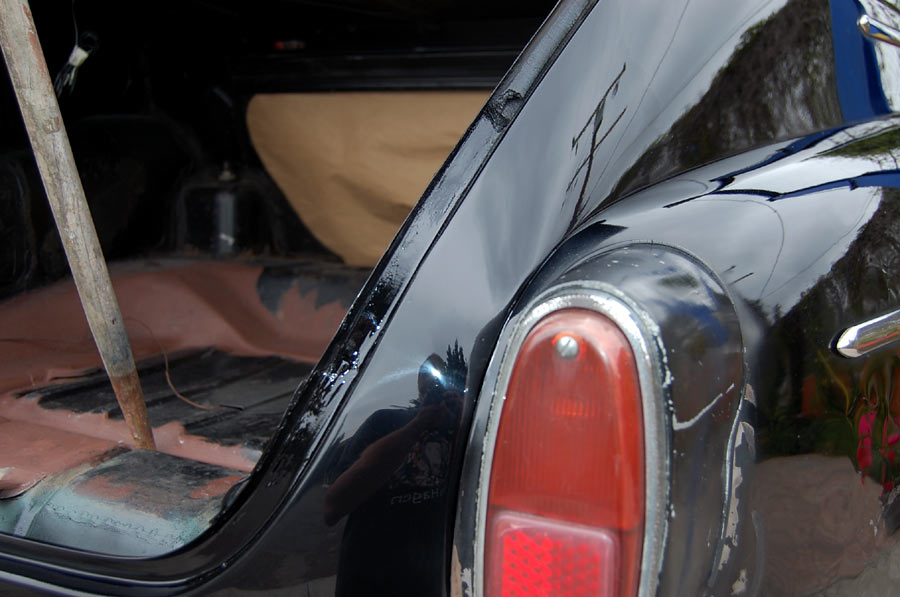
Finally, the rubber collar around the fuel filler neck was broken. Not pretty, but far less concerning than the ancient hose that connected the fuel filler neck to the gas tank. Dripping fuel + hot exhaust = bad combination. I changed both (note: hose has to be trimmed to size) and at the same time cleaned up everything in its vicinity, including those original hose clamps.
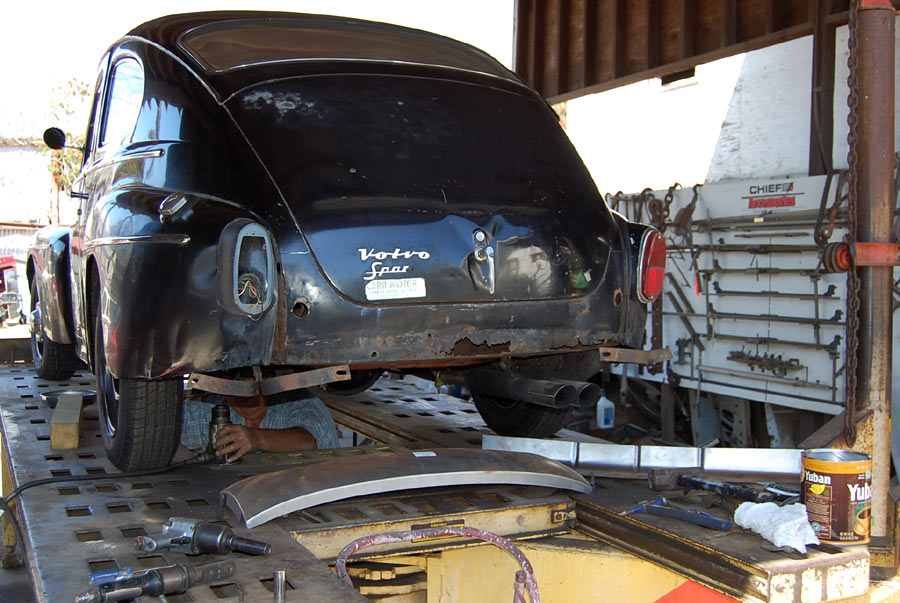
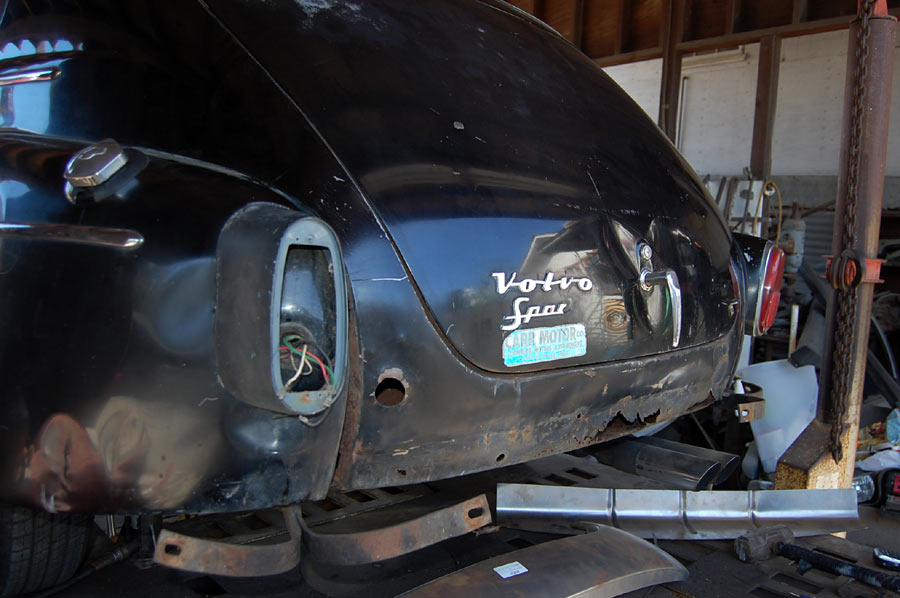
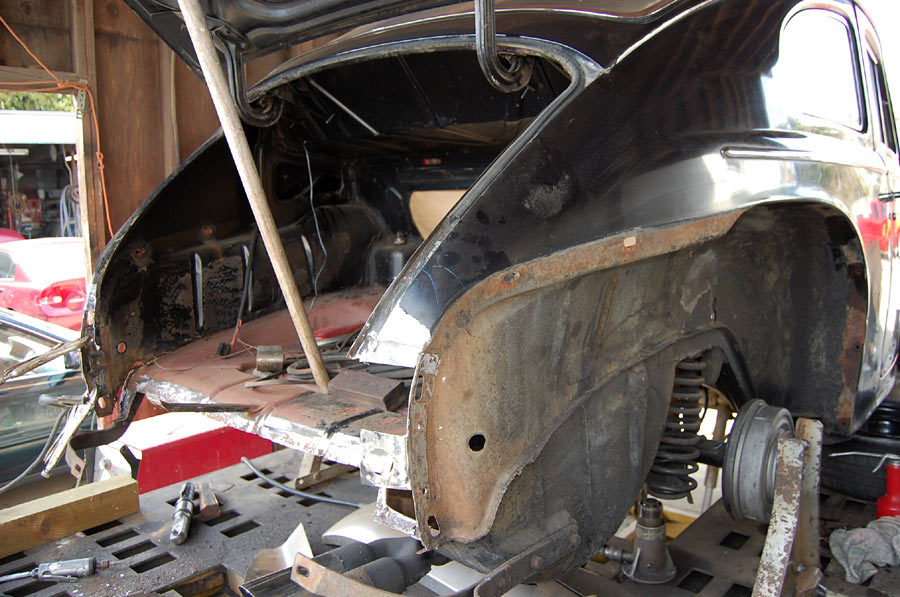
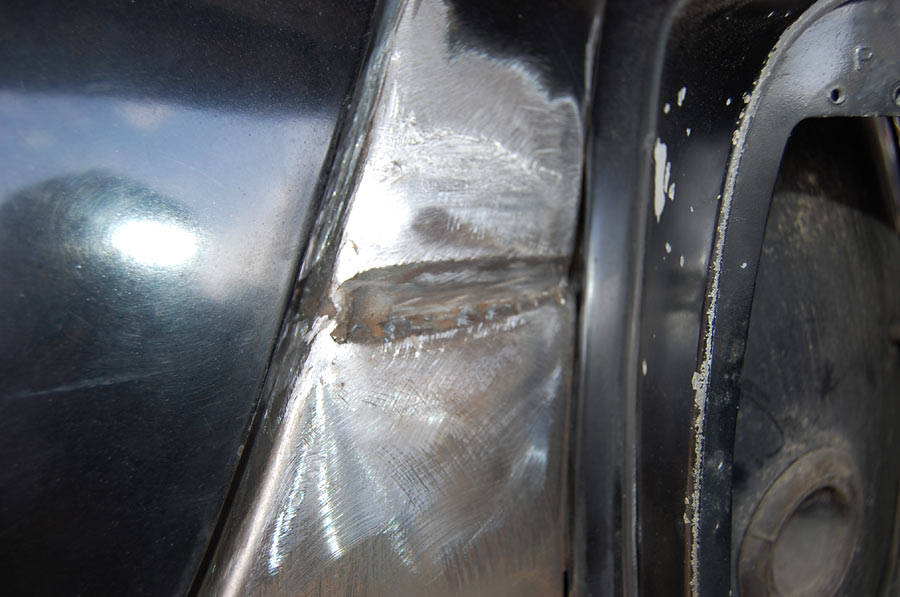
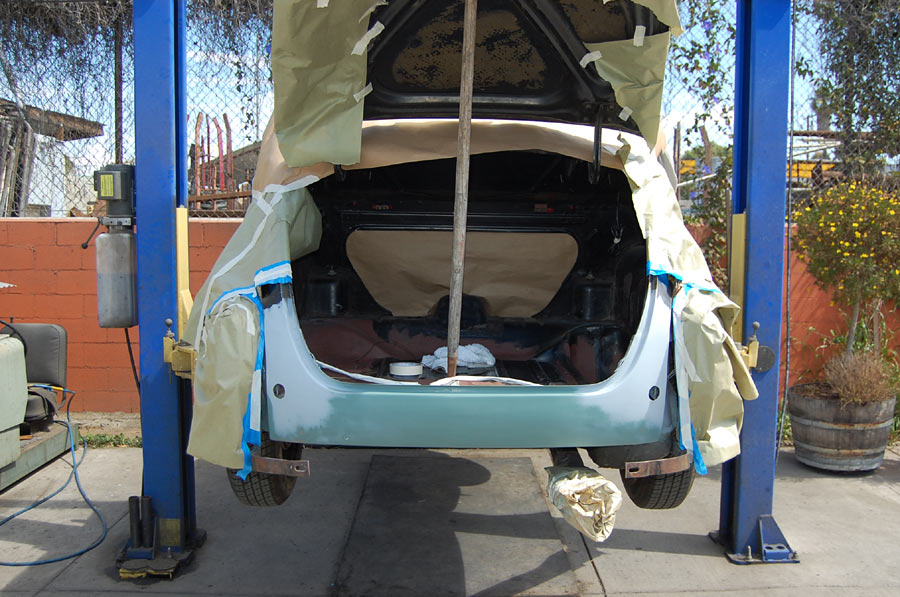
It's April 2009 now, and I finally was able to book John, my favorite, not-yet fully-retired body repair man to address the rear end damage the way it should be done.
|
|
Click on any of the above images for a full-size view
John's in his 60s and works at his own pace. After 30 years on the job, he knows exactly what he's doing. Luckily for me, he charges me only $100 per day, which for him has usually 6 to 8 working hours. The phrase "worth the wait" certainly applies here.
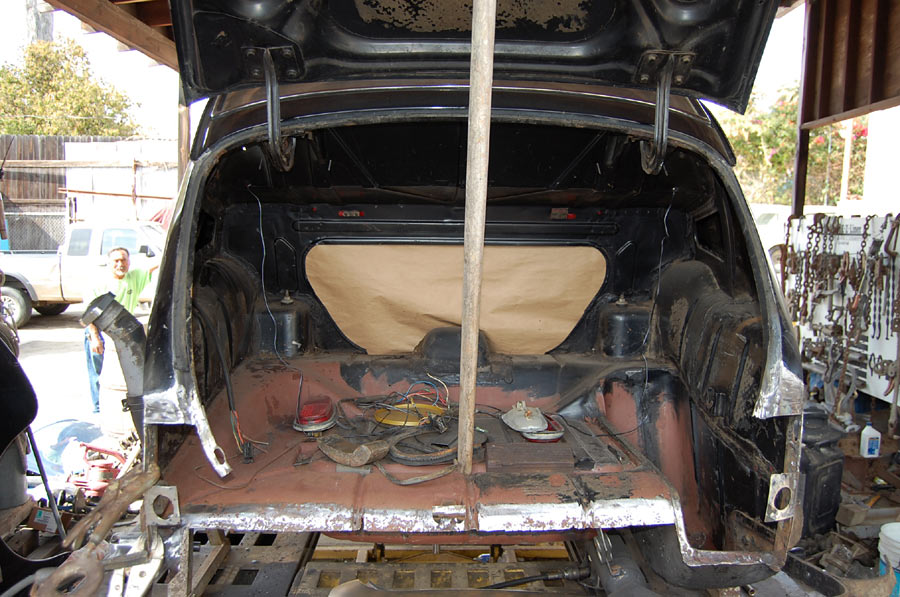
Click on the above image for an XXL-sized view (900 x 597 pixels)
The car was strapped to a frame machine, the bumper and rear fenders were removed. Then everything was measured and re-measured before the car was slightly pulled and released, in very small steps (as metal has a memory). About 2 work days into the job, everything was in perfect alignment again and the damaged sections were cut out.
Mistakes happen, but pulling a car is an area where you do not want to make a mistake, not even a small one.
|
|
|
|
|
|

|
|

|
|
|
|
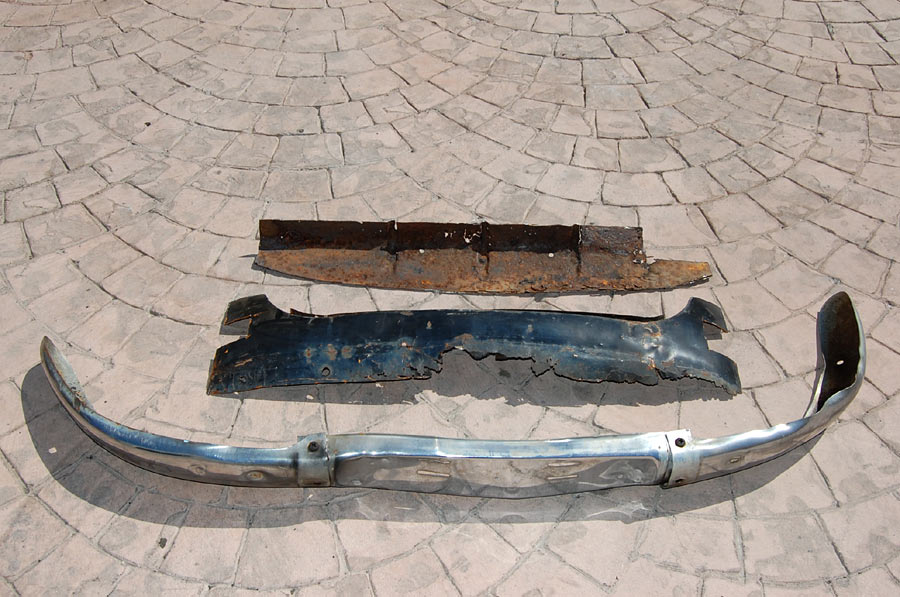
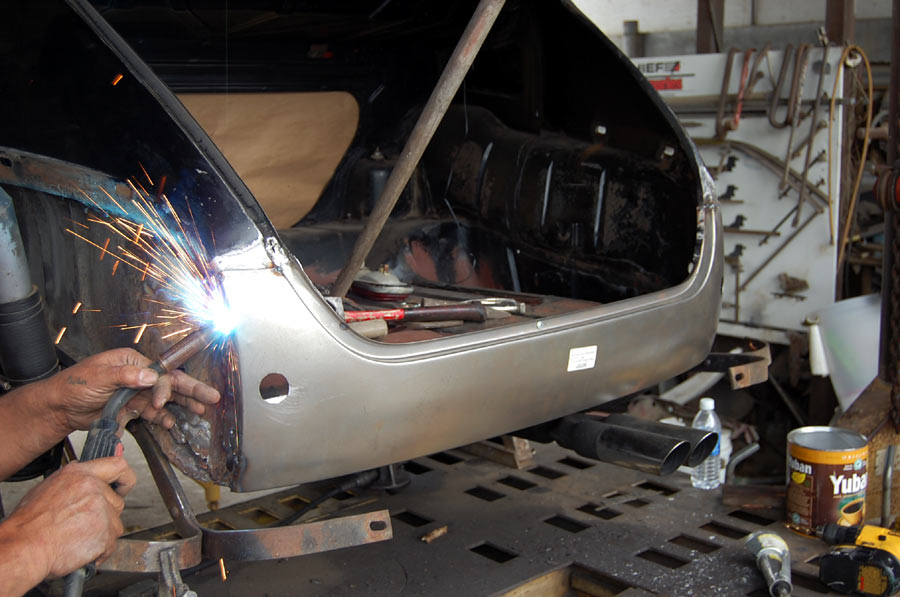
Click on any of the above images for a full-size view
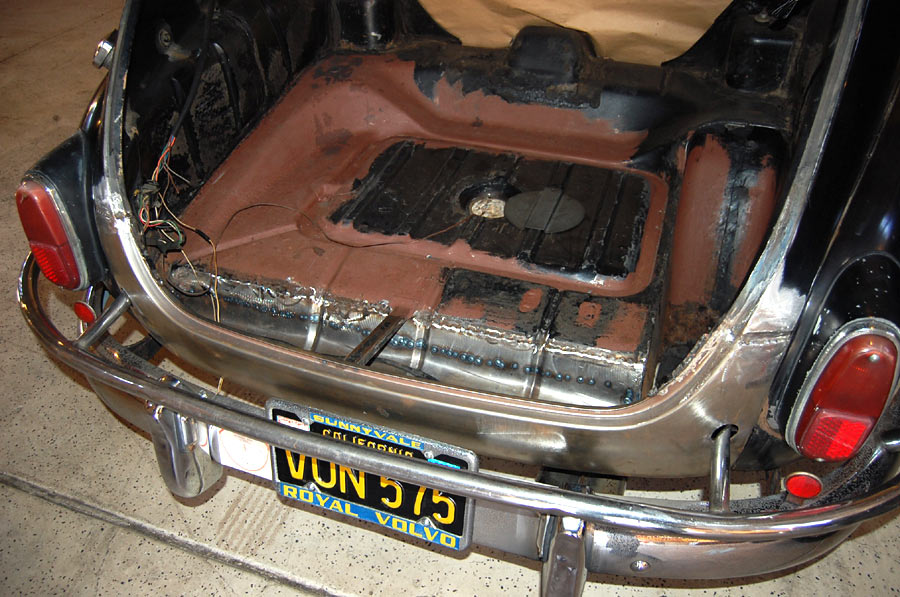
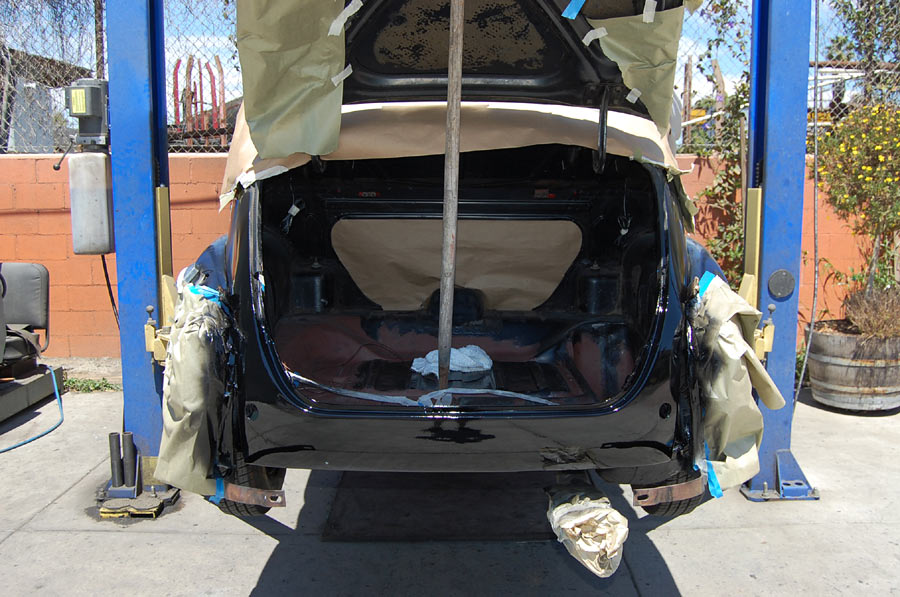
The new rear valance and rear trunk panel were welded in place. Here it is crucial to make sure that the gaps between the trunk lid and the adjacent body panels are uniform all around. To get it right takes time, patience, and expertise. Notice two things: (1) the parts of the old panel that contains the opening holes for the bumper overrider were left in place to serve as templates when drilling those holes into the new valance; (2) the use of lead where the new and the old panel where joint. Old World craftsmanship at its best!
|
|
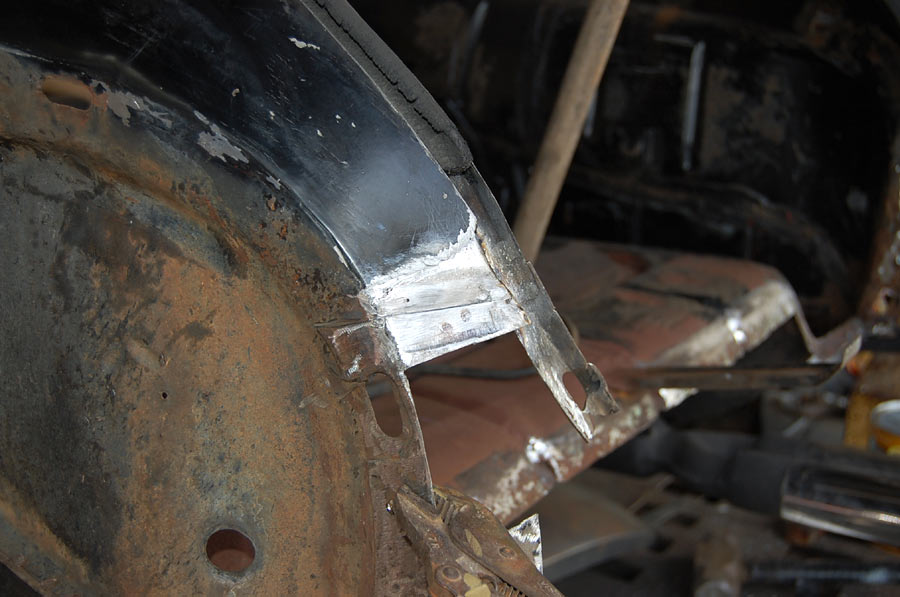
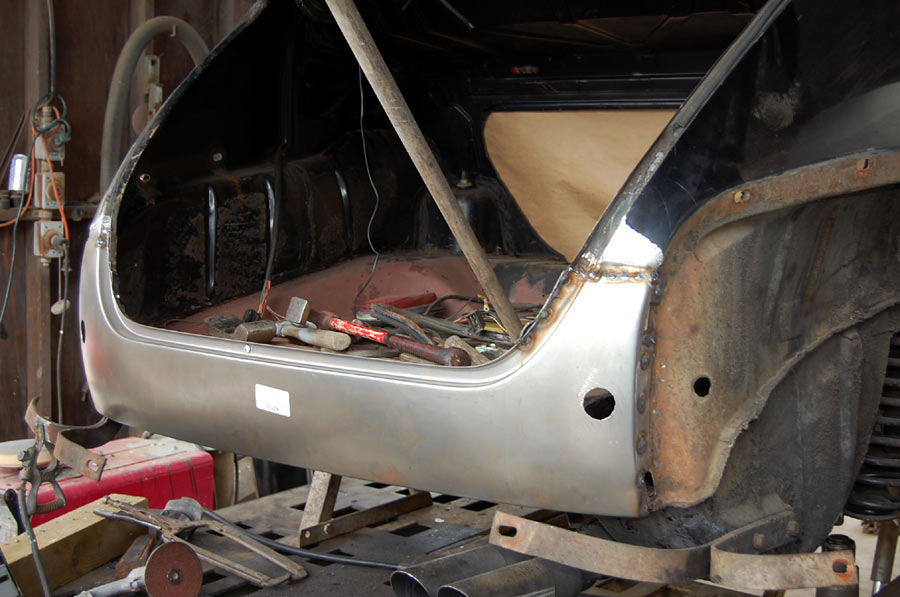
Click on any of the above images for a full-size view
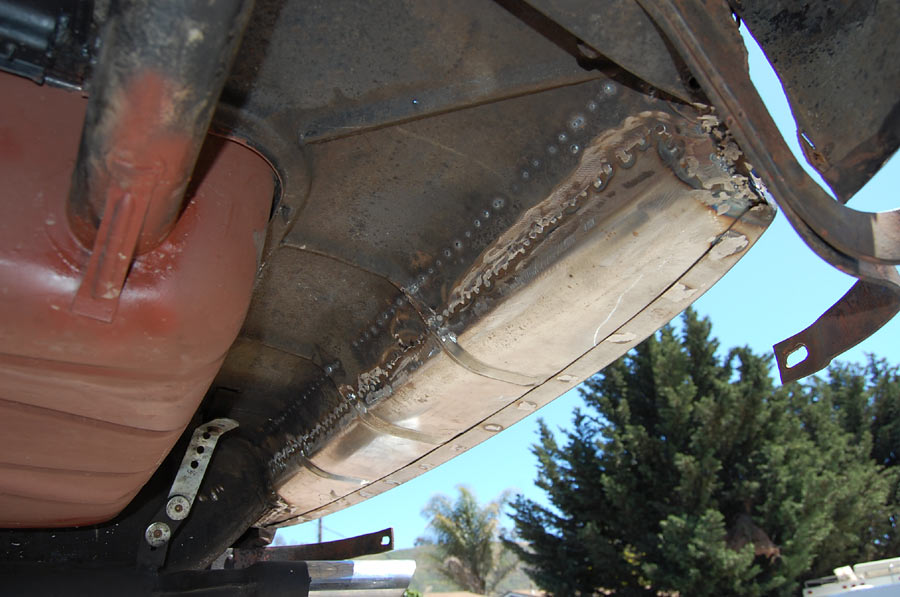
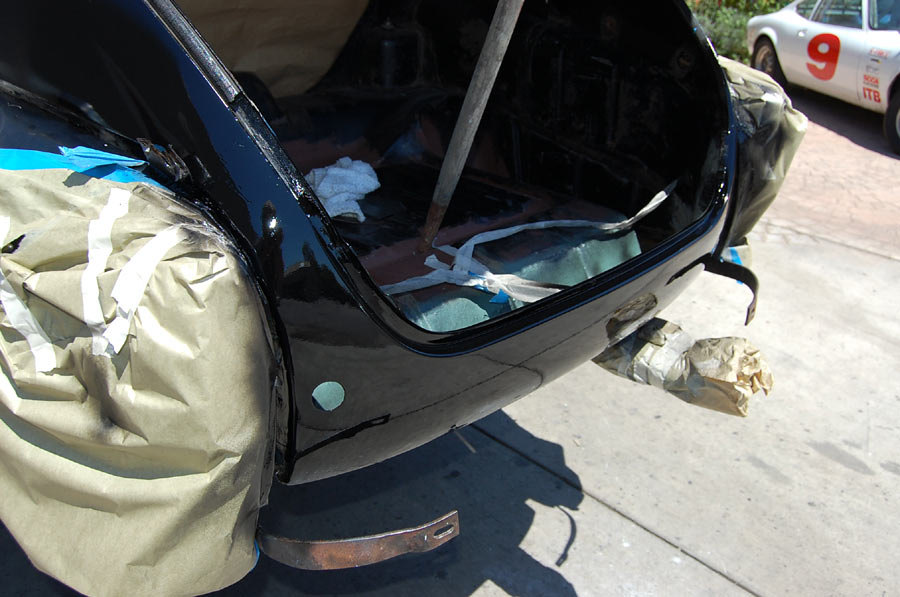
Very little filler was needed to smoothen the sections where old and new panels were welded together. Everything else was straightforward: self-etching primer, epoxy primer, paint. I chose to paint outside on a hoist, in order to paint all the way underneath the rear valance.
|
|
|
|
Click on any of the above images for a full-size view
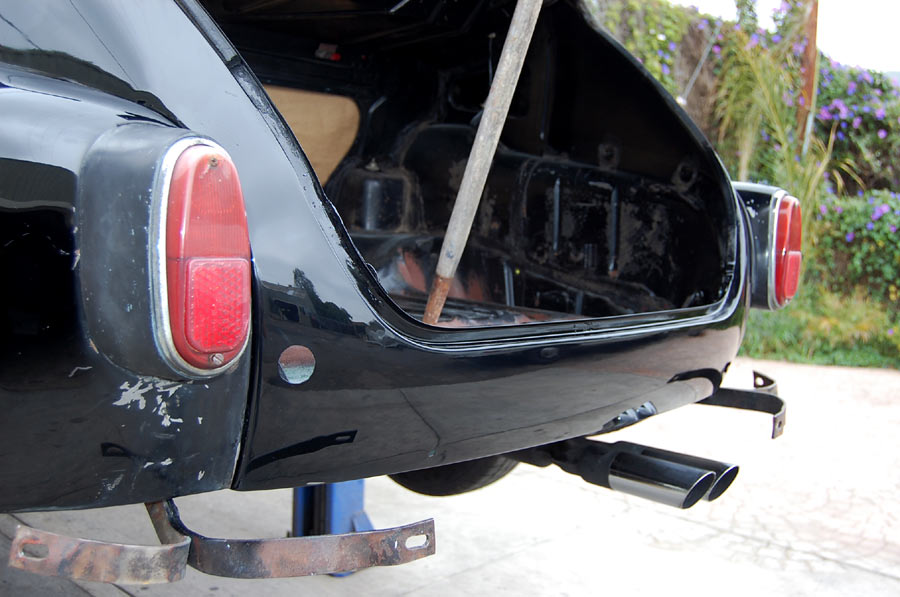
All cars of this vintage were painted with single stage paint which has the invaluable advantage that it ages evenly and gracefully throughout the decades, given enough time (i.e., 50 years) all the way down to the primer.
In stark contrast, two stage (base/clear) paint can never acquire patina, and the top coat will peel eventually, often within 10 years or less, thus requiring an expensive strip and repaint. If you have ever seen modern cars with peeling top coat paint, you'll get my point.
Remember this: if a painter tells you that single stage can't be blended-in properly, or that today's two-stage paint systems are superior, he's either ignorant or incompetent, if not both, and the above photos are proof of that. Modern paints (the newest ones are even water-based) serve only one god, the environment, not you or your car. I would never paint a Classic in an improper and inferior fashion because of a incooperative or incompetent painter, and neither should you.
Twenty years from now, a car that was expertly painted with single stage paint may look original again, like it has never been repainted. A car painted with two-stage paint won't, ever.
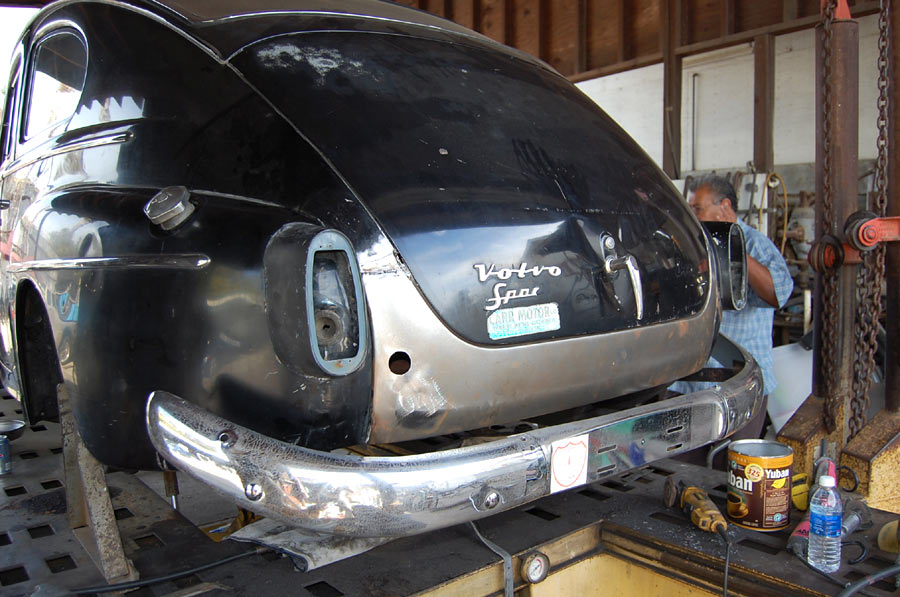
Click on the above image for an XXL-sized view (900 x 627 pixels)
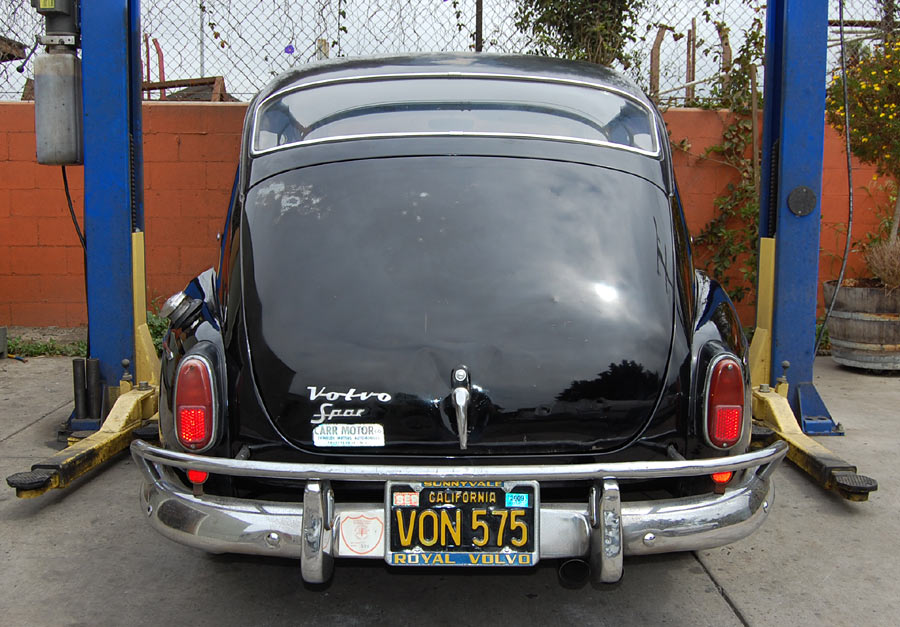
With the new (used) rear bumper mounted, you'll be hard pressed to detect that the car ever had a banged-in rear. Nor does it look like a partially painted car. Things will even get better as the new paint fades gradually.