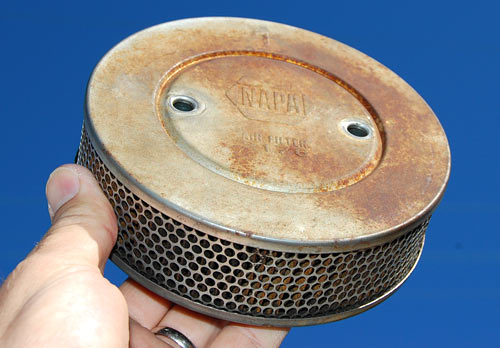
If you happen to own a classic Volvo, equipped with twin SU carburetors, such as a 444 Sport, 544 Sport, or 122/123, you'll most likely know that replacing the air filter elements requires to replace the whole units, including metal housings.
As of the time of this writing, ipd charges $97.35 (plus shipping) for a set of 2 bolt filters. Ouch!
For anybody not completely into a bone stock appearance, separating housings and elements of a set of old filters from one another, so that only the paper elements can be changed, is therefore the way to go.
In 5 easy steps I'll show on this page how this can be done within about an hour, easily, by anyone with two hands. Don't be shocked by the appearance of the ancient NAPA filters I'm using. I love those and will keep them forever, as they match the heavily patinated look of my 1962 Volvo PV544 Sport perfectly. "Normal" people will most likely try to use the nicest filters they can find or, if they are frugal, use the ones they have on their car.
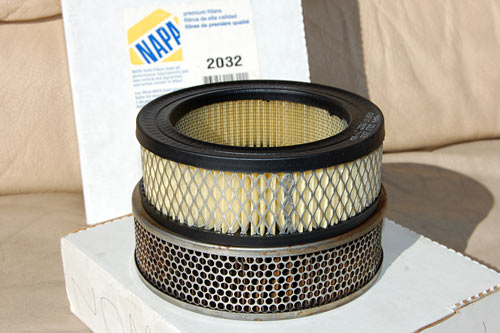
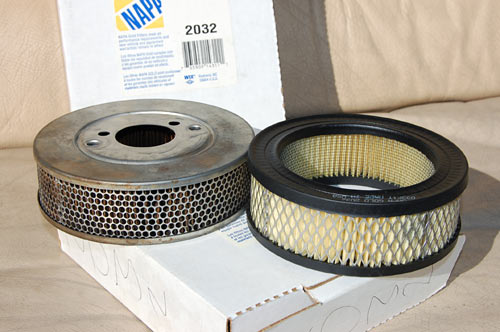
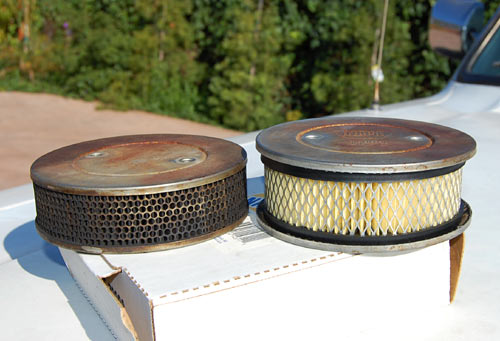
The filter elements I used are NAPA Gold #2032. They sell for $6.88 each. How's that for saving money?
Note that the NAPA elements are a notch smaller in diameter and slightly taller in height than the originals. If you take the time to shop around, you will find that there are many such elements in very similar sizes available.

Click on the above image for an XXL-sized view (900 x 544 pixels)
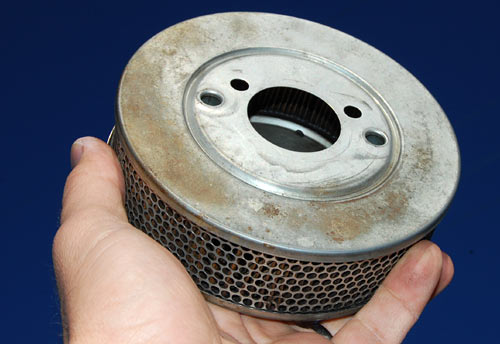
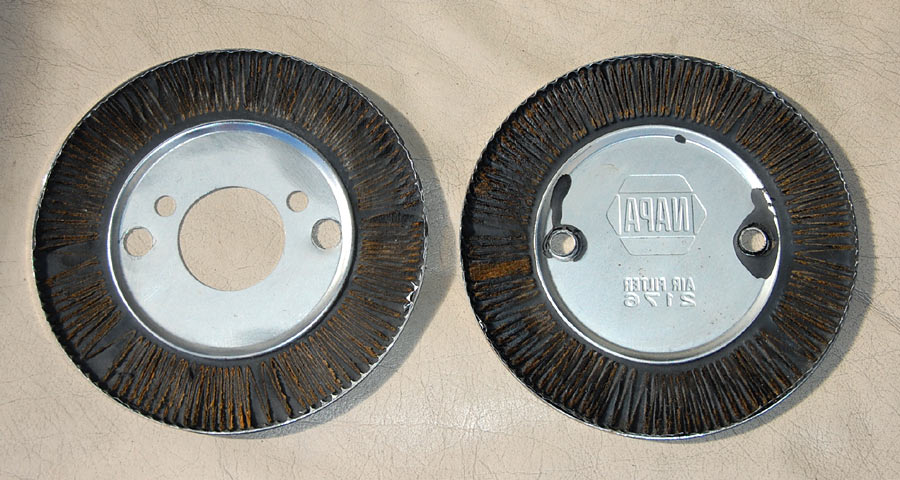
First thing you do is separate top from bottom by cutting all around. I used a cutting wheel but you can use a saw, metal scissors/sheers, or a grinder, whatever you have at hand. This doesn't have to be pretty or precise.
You also need to get the drill out and slightly open up the rivets on the bottom that hold the guidance tubes for the bolts so that they come loose. When that's done, wiggle and twist until the two pieces separate. Brake off the tubes and throw 'em away.

Click on the above image for an XXL-sized view (900 x 627 pixels)
Now it's time to do the cleaner cuts. Take your time and precisely cut around the corner of the top and the bottom. If you miss a piece, you can always cut or grind off more. When you're done, peel off the old paper stuff and throw it away.
Click on the above image for an XXL-sized view (900 x 480 pixels)
If you have a bench grinder with a wire wheel, use it to remove the remainder of the paper. If you don't have one, use your imagination and scrape off that stuff with a knife, razor blade, or something similar. What you'll be left with is some dried out glue that won't show and won't matter in any way, form, or shape.
If you absolutely must have the housings devoid of any glue, try heat in form of a heat gun or--if you are brave enough--a torch.
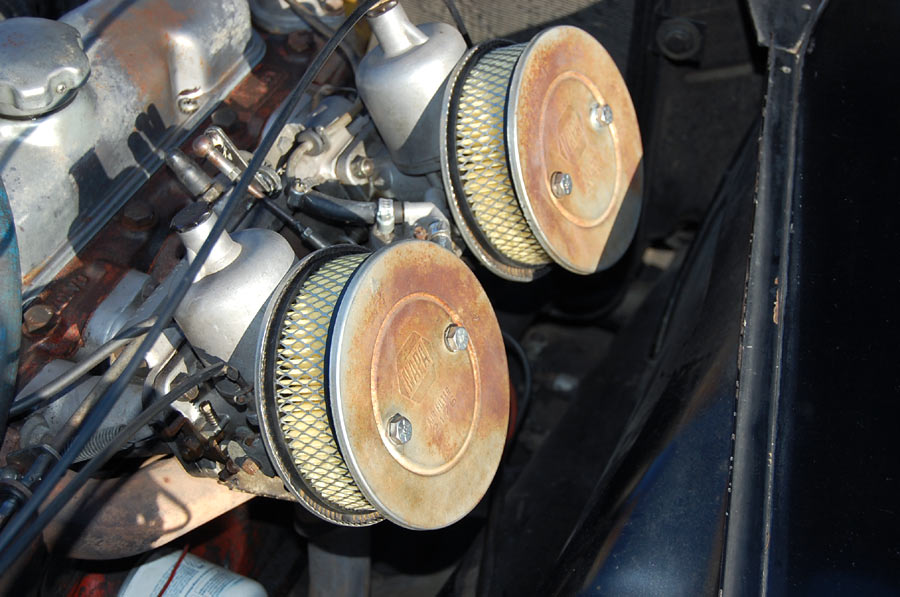
Clean the pieces with carburetor cleaner and put the new filter element in between the top and the bottom part. The NAPA filter elements have a visible seam, so you might want to turn the filter element until it points downward so that it won't show when the filters are mounted.
Not compressed by the bolts, the newly assembled filter is about 1/4-inch taller than the "original."

Solution? Buy bolts that are 1/2-inch longer! Since these are standard, not metric, all it takes is a short trip to your local hardware store. I paid $2 for 4 bolts.
Click on the above image for an XXL-sized view (900 x 597 pixels)
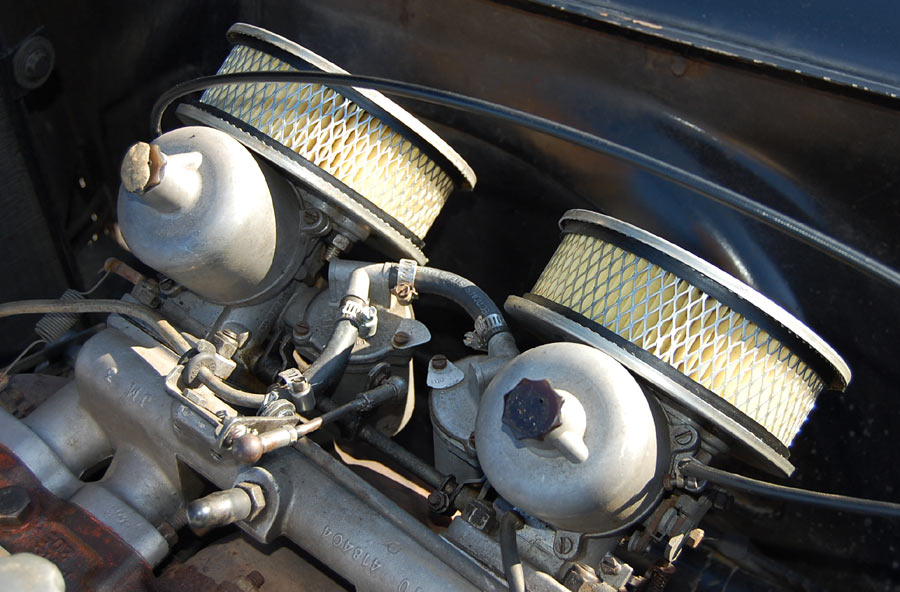
Now grab the 1/2-inch wrench and mount the filters loosely to the carburetors. Slowly tighten them a bit more until common sense tells you it's the right time to align them precisely so that the elements are exactly centered.
Now tighten the nuts until you can't move the filters anymore. Don't overtighten; it's not a driveshaft!
Click on the above image for an XXL-sized view (900 x 592 pixels)
To the casual observer, the new filters look perfectly stock, so for anybody but the most discriminating Volvo owner, the conversion is an hour well spent. The longer you keep your car, the more you save!